February is the perfect opportunity to dust off your creative skills and get candling. There are very few rules (despite what the fancy candle sites want you to think), and you can make whatever your sweet, little candling heart desires, from Lumière to candle macarons.
As an added bonus, your candles will make the perfect Valentine’s Day gifts, no matter how terrible they look.
You don’t have to be crafty to make candles. In fact, candle-making requires little to no skill, just a lot of patience. So, what are you waiting for?
WHAT YOU’LL NEED:
• Candle wax of any kind — Michael’s carries several types of wax (beeswax, granulated wax, and paraffin wax), which will work just fine. But I recommend phoning up your aunts and grannies and asking them for any old candle stubs they have floating around in their cupboards.
• Candle wicks
• Wax crayons (any colour)
• A pot you don’t mind getting wax on
• Several large jars (pickle or other)
• Candle moulds/glass jars
• Essential oils (optional)
• Metal spoon
• Paring knife
1.Choose your shape
First, decide whether you want to use a candle mould or a simple glass jar.
There are no wrong answers.
Etsy carries countless candle moulds if you want to get fancy (anything from cacti to seashells, intricate geometric shapes, and Victorian busts), but almost anything will work as a mould. Want an easy mould for a square candle? Save your one-litre milk cartons. Want to make a coffee-themed candle? Pour your wax into a dollar store glass mug for a fun twist. Want small, uniquely shaped candles? Use a silicone ice-cube tray.
Jars are more conventional, but you can use any shape or size. Dollar store glasses, mugs, and mason jars are just fine.
2. Choose your colour
Choose the colour you want your finished candle to be and select that colour of wax for melting. You may only be able to find white wax at Michael’s, but don’t worry. You can still add colour later (see step 4).
Fill an old pot a quarter of the way full of water and set it on the stove to boil while you do the rest of the prep.
3. Chop your wax
Roughly chop the candle stubs or regular wax into smaller chunks. This will ensure that your wax melts down more easily.
Old candle stubs can be harder to cut down than fresh wax, so be careful. Also, make sure to cut the wick out of old candle stubs to avoid strange-looking floaties in your candles.
If you don’t want to get your cutting boards caked full of wax, cut your wax on a folded paper towel instead.
4. Melt the wax
After you’re finished chopping your wax, place it in a large jar (pickle jars work well) and set the jar in the boiling water to form a double boiler.
It’s a good rule to keep wax colours separate and use one jar per colour. Mixing wax colours usually doesn’t turn out well.
If you want to colour your white wax or darken an existing colour, take a wax crayon (peeled and chopped) and add it to your jar of melting wax. Be careful not to add too many crayons. Crayon wax is slightly different than candle wax, and if you add too many, it can make your candle harder to burn.
Depending on the kind of wax you use and how much you add to your double boiler, it can take anywhere between 10 minutes and an hour to completely melt your wax. Resist turning the heat up all the way on the stove. If water splashes inside your jars and into your wax mixture, it could cause cavities to form in the candle when it sets.
If you want to add a scent to your candle, add it now while your wax is melting. If you are adding essential oils, be sure to do some research before adding any to hot wax. Some essential oils can catch on fire if they are added to a very hot substance. You may need to let your wax cool slightly before you add the oil in.
Quick tip: Candle wax tends to get everywhere, so make sure you stir your wax with a metal utensil that can be heated to remove the wax, not a wooden spoon.
5. Prepare your mould/jar
Each mould will have different instructions for use, so carefully read the instructions before you pour your hot wax inside.
Make sure to attach the wick now, or else you will just have to melt your newly minted candle down and start again.
Before you pour your wax into the mould, stabilize it either in a bucket of sand or by packing it in place with rags. This will prevent wax from spilling all over your counters, and it will make sure your wax doesn’t dry at the wrong angle.
If you are using a glass or jar for your candle, tie the wick onto a popsicle stick and rest the popsicle stick across the top of the jar, so the wick hangs inside. You can secure the wick to the bottom of the jar with a thin strip of masking tape or a small ball of sticky tack. That way, the wick will be less likely to move when you pour your wax inside. It’s important to pull the wick taut; otherwise, it will twist inside the candle and make it hard to burn.
6. Pour the wax
Once your mould/jar is prepared, you can pour your melted wax inside.
Have fun with it!
Feel free to layer different colours, let the wax harden at different angles, or throw in some glass beads or coffee beans for texture.
Stay away from adding dried flower petals or any other flammable substances to your candles.
If you do choose to layer more than one colour in your candle, let the layers set for at least two hours before adding another colour. If the jar or mould is still warm to the touch, it’s too early to add another layer of wax.
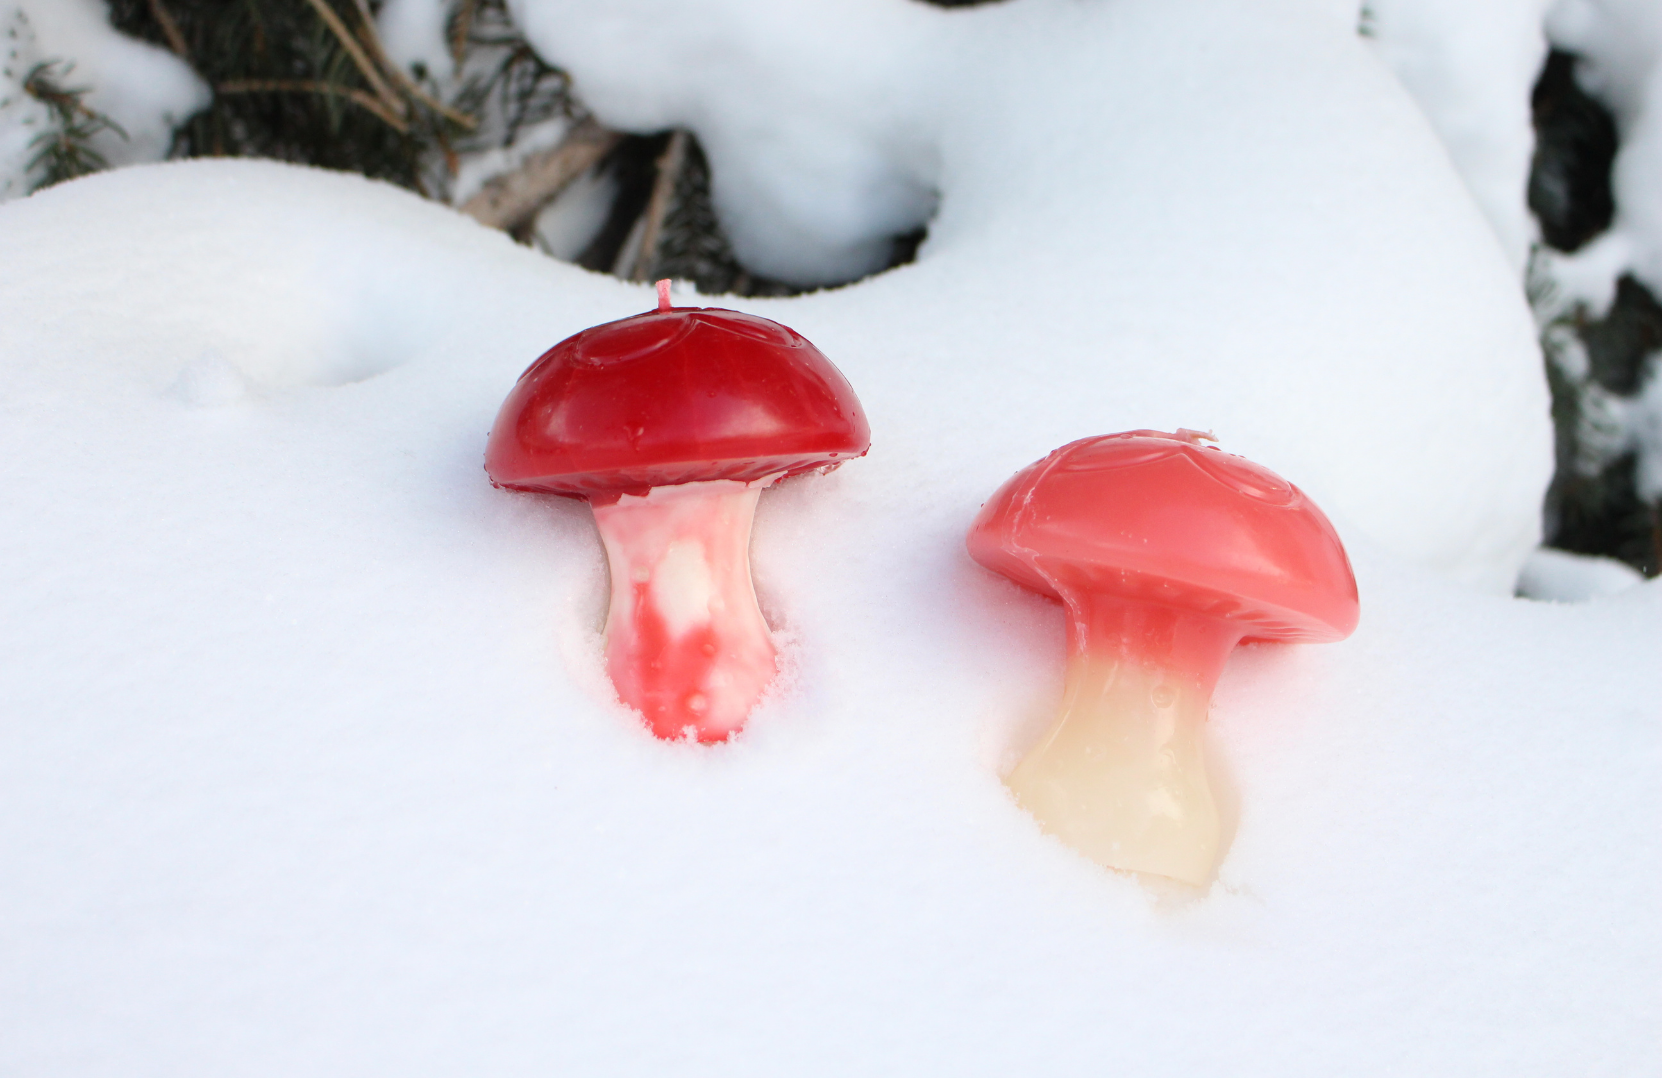
One benefit of our long Edmonton winters is that you can pop your candles outside so they set faster. I’ve even put candles directly in the snow for optimum cooling.\
7. Remove from the mould and trim the wick
Once your candles are fully set, you can remove them from the mould or remove the popsicle stick holding the wick in place.
Trim the wick back to a quarter of an inch above the wax.
If you used a mould with two halves and there is a visible seam on your candle, you can dip a paring knife in hot water and gently shave away at the seam until you are left with a smooth candle.
Then light your candle and enjoy!
Image credits: Mya Colwell